- Introduction
- 1. React Native Internals 📡
- 2. Setting up the project 🌈
- 3. See it in action! 🎬
- 4. Project Structure 🏢
- 5. Conventions and Code Style 🎓
- 6. Testing and Debugging 🚫🐞
- 7. Styling 💅🏻
- 8. Redux 🗄
- 9. Navigation 🚪
- 10. DevOps ⚙️
- 11. SVG Icons using react-native-vector-icons 🐾
- 12. Internationalization 🇮🇳🇺🇸🇷🇺
- 13. Custom Native Modules 🍮
- 14. References
- 15. The End
- Published with GitBook
Creating custom icon set
react-native-vector-icons supports using custom icon sets if you do not want to use the icons which come bundled with it or if you want to add your own icons. It supports Fontello and IcoMoon to create custom fonts. We used IcoMoon to convert our SVGs to a config which is readable by the library.
Setting up the framework
Install the npm module using npm or Yarn.
npm install --save react-native-vector-icons
or
yarn add react-native-vector-icons
Configuring your project to support custom icon sets.
We will use IcoMoon to support custom icons/fonts. Icomoon is a free and open source application which lets you convert a set of SVG icons to fonts. It is a front end only app and does not upload your icons anywhere, so there will be no privacy concerns!
The steps for the configuration are as follows:
Create a resources folder where we will keep our custom font file (.ttf).
Do
react-native link react-native-vector-icons. This will set up the vector icons framework for you.
That's it, you are done with the setup. Now we need to get the TTF file and place it in the resources/fonts folder that we just created.
How to generate .ttf fonts using IcoMoon:
Open the IcoMoon application.
Remove the current set (if there is one) and create a new empty set and give your preferred name (remember to give the same name everywhere).
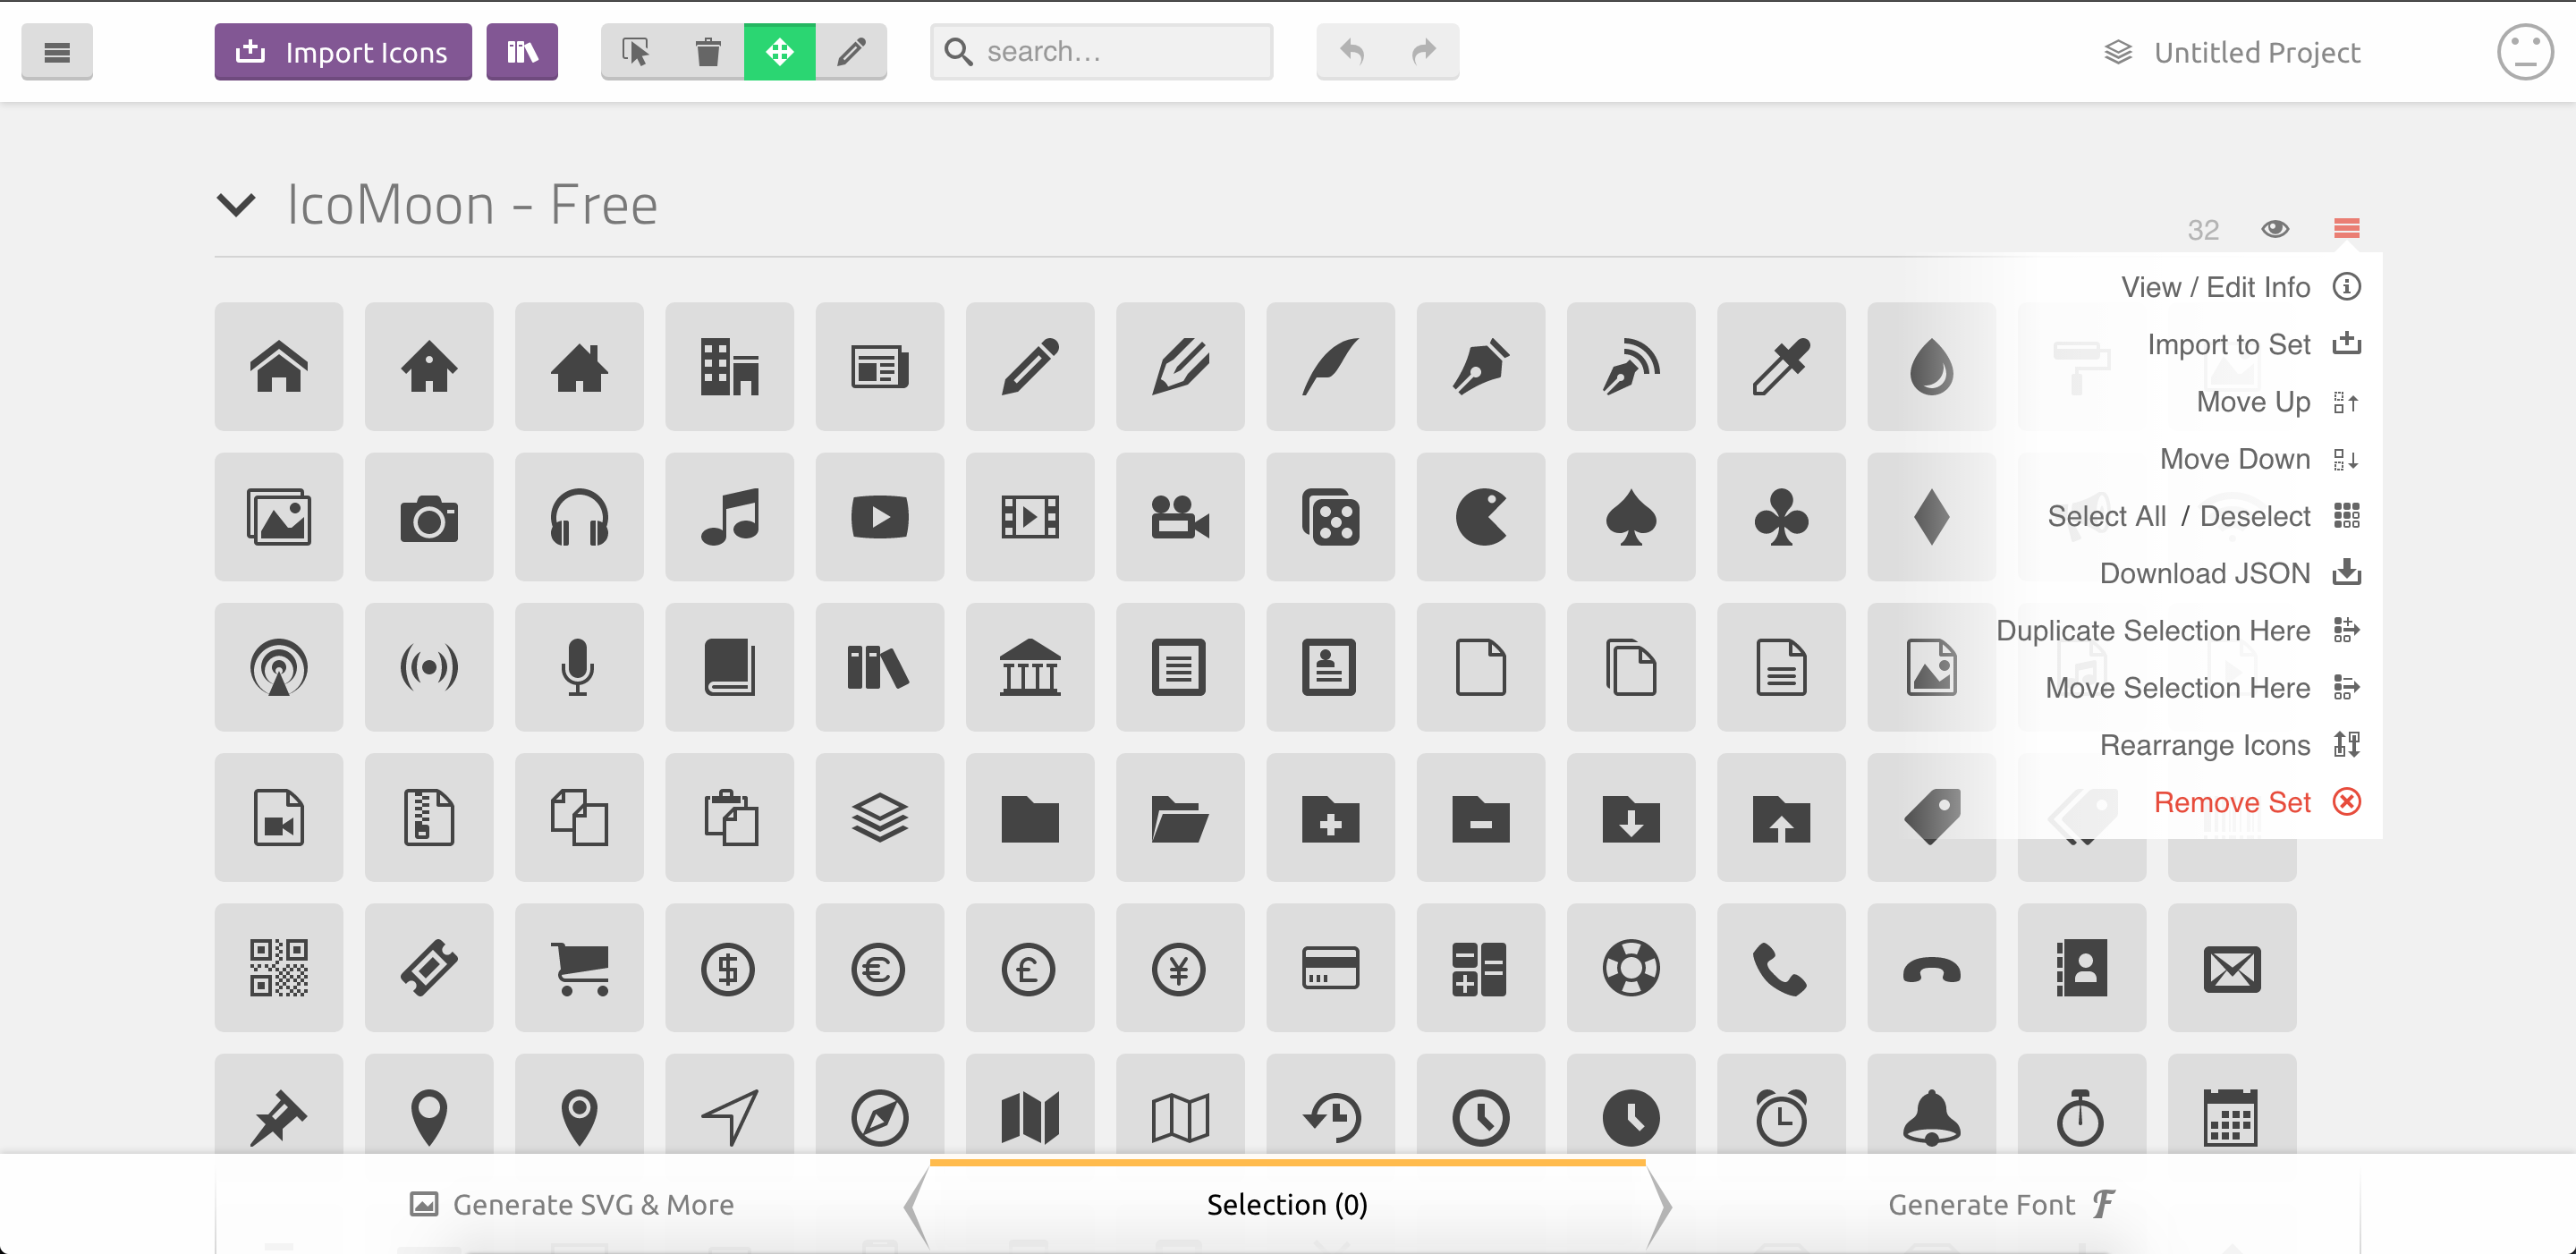
Drag and drop your SVG files onto the tool.

Select the files which you want to export. Select all if you want to export all the icons.


After the selection, click Generate Font. This will download a zip file to your system.
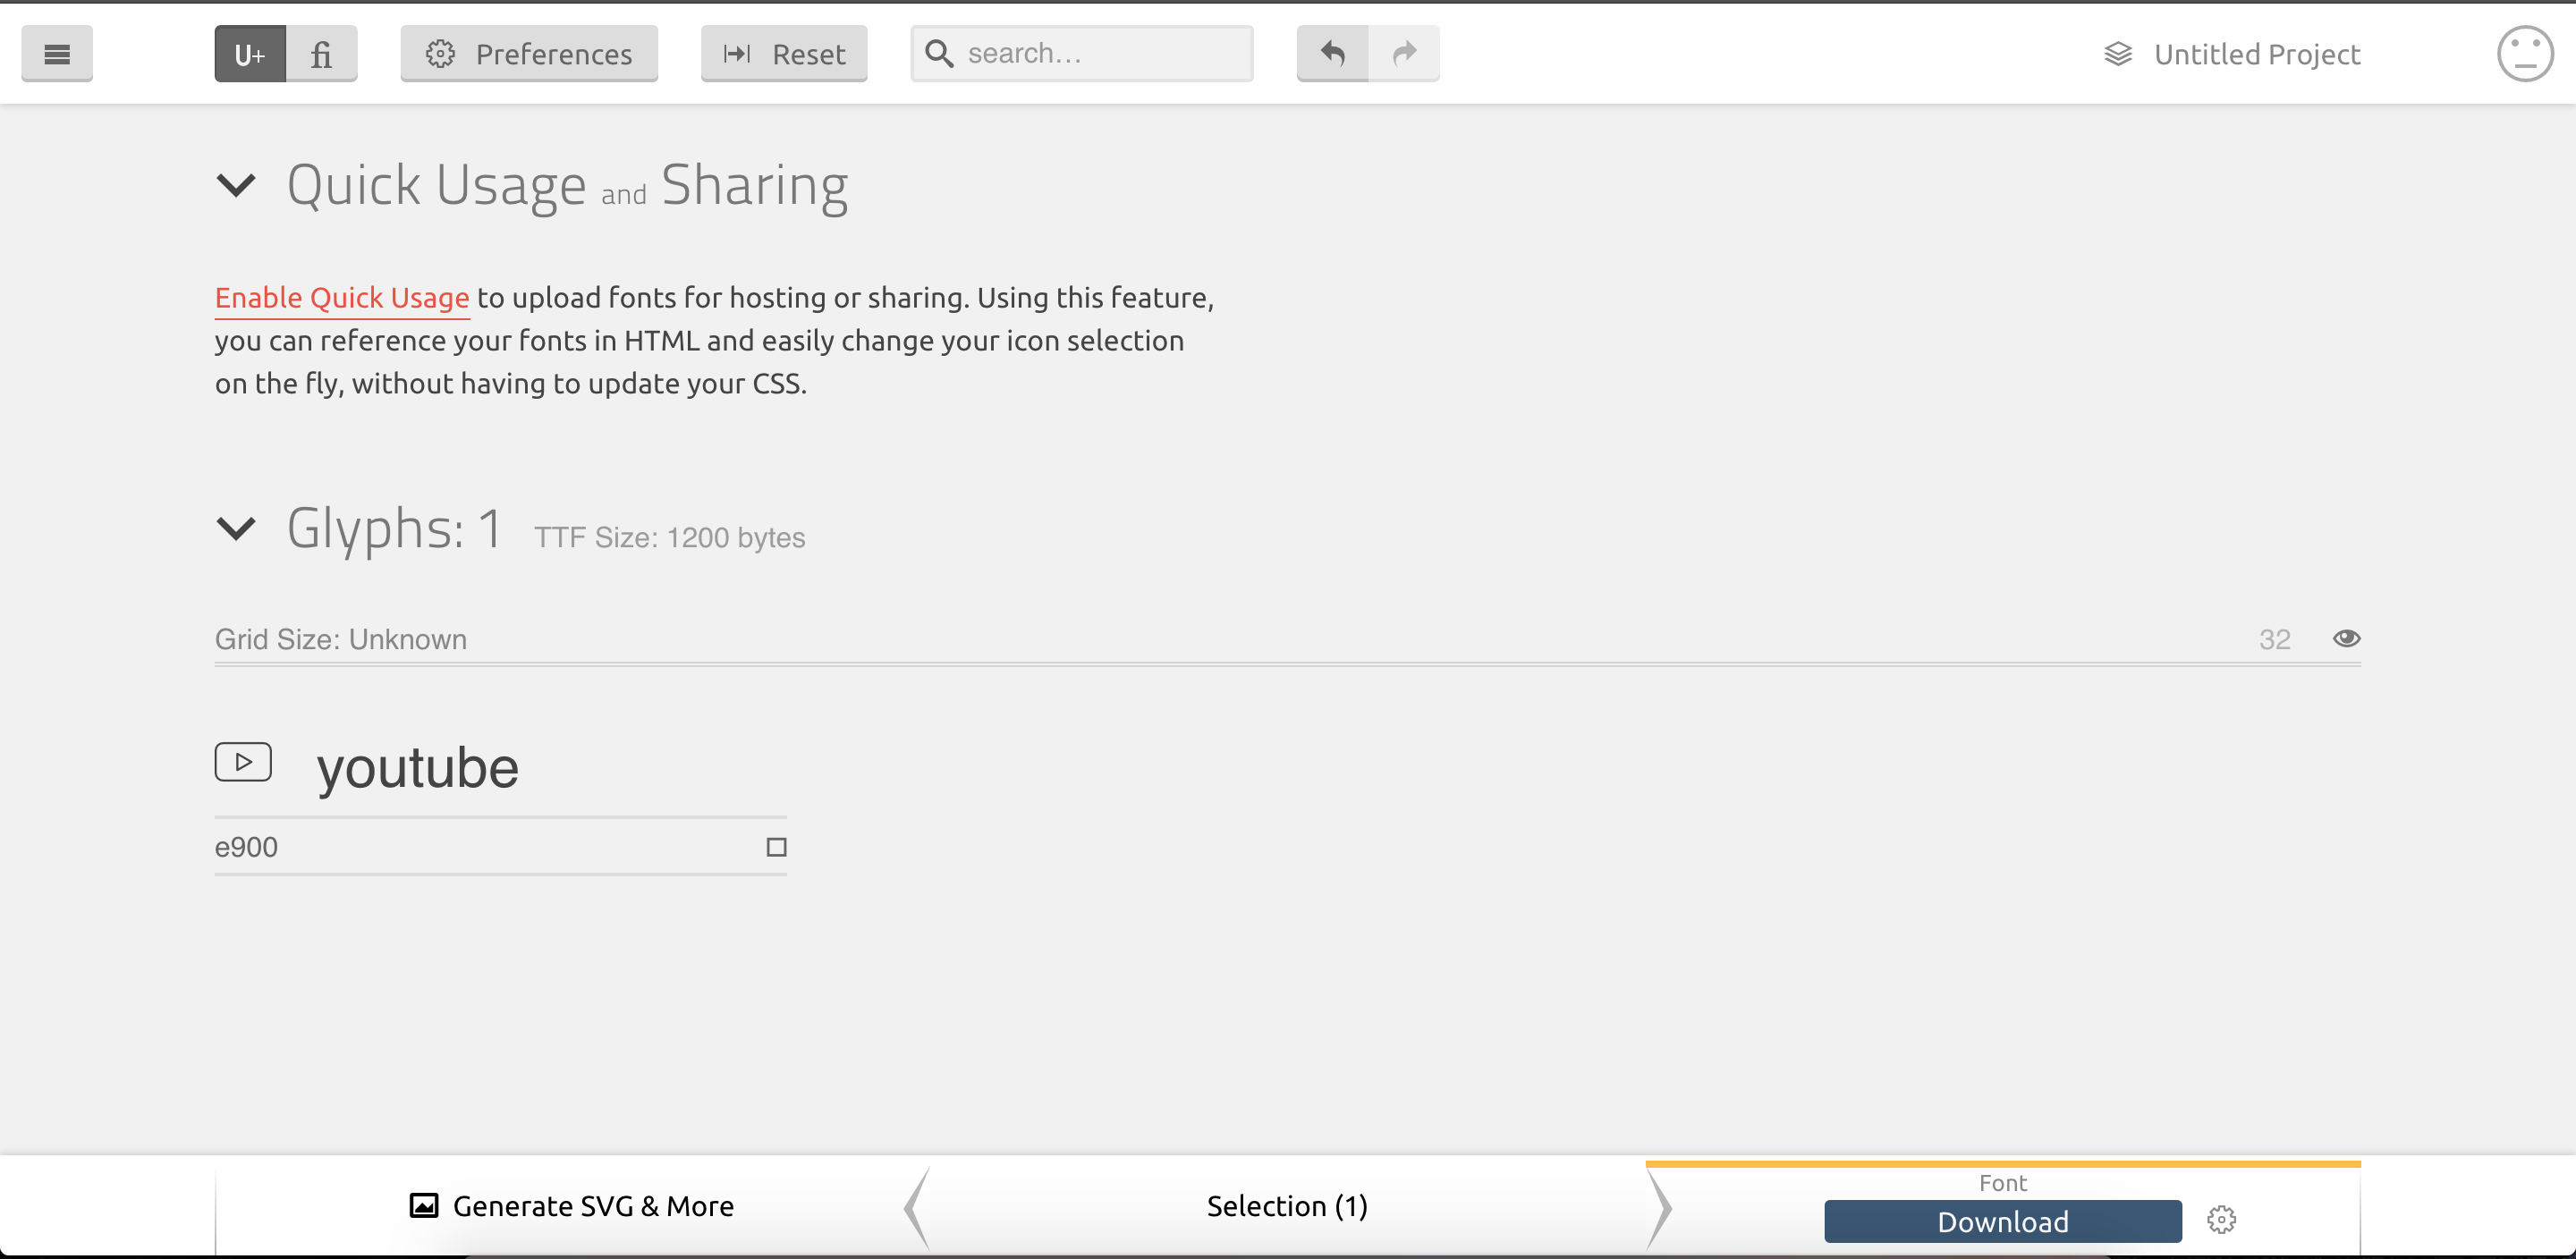
The zip file will contain a selection.json file and a fonts folder containing a .ttf file. We only need these two files to use fonts in react-native.

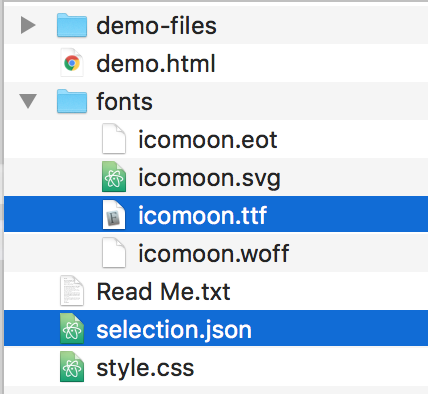
Put the font file (.ttf) in the
resources/fontsfolder and add the following script to the package.json:"rnpm": { "assets": [ "resources/fonts" ] }This script will copy the font files to both Android and iOS folders. After this, whenever we want to update the fonts, we will do
react-native link react-native-vector-iconsand the fonts will be copied/updated automatically to both Android and iOS projects.Put the JSON file (selection.json) in your app and create a file called CustomIcon.js. Import the selection.json in CustomIcon.js.
import {createIconSetFromIcoMoon} from 'react-native-vector-icons';
import icoMoonConfig from './selection.json';
export default createIconSetFromIcoMoon(icoMoonConfig);
That's it! To use a font simply import the file as a React component and pass the icon name and size (optional) or even style.
import CustomIcon from './components/CustomIcon.js'

<CustomIcon name='android' /> //To use the icon
<CustomIcon name='android' size={25} /> // To pass size
<CustomIcon name='android' style={styles.androidIcon} /> // To pass custom tyle
Changing file names of the font file
The default name of the font file is icomoon.ttf. If you want to give it a different name, go to Preferences after step 5 and change the name there before downloading. Also, make sure that if you change the font file name, give the same name to the set as well (by default it is "Untitled Set").
It is not recommended to change the filename of .ttf font file after the setup/native linking. The filename gets written in project.pbxproj and Info.plist and the file gets copied to android/app/src/main/assets/fonts/ once you run the link command. If you wish to change the filename, you would need to take care of changing the above 2 files as well, and removing the unused icon from the android folder which might cause problems if not done properly.
How do I add/delete icons from the font file (.ttf)
You can easily change/delete the contents of the font file. The tool only needs the selection.json file, which defines the font configuration. The steps for the same are as follows:
Open IcoMoon App
Upload the current selection.json file.

Edit/delete the icon using the tools on top. (Adding an icon is the same as step 3 mentioned above)
After the editing is complete, generate a new font file by following the steps 5 and 6 mentioned above. Once you have the new font file and the new selection.json file, place them in their appropriate locations in the app and do
react-native link react-native-vector-icons.
That's how you change the icons. Pretty neat huh?
This will let us convert any SVG image to a font which is scalable, platform independent and easy to style. What else can you ask for, right?

The code till here can be found on the branch chapter/12